前言
TensorFlow Lite 使用更小的位元大小以及輕量運算量得到更好的效能,對行動裝置以及嵌入式裝置更加的輕量化。佈署 TensorFlow Lite 的時候,首先要把 Python 訓練好的模型透過 TensorFlow Lite Converter 進行轉換成 .tflite,就可以將轉換好的模型部署在行動裝置中。
將模型封裝起來部署在手機端有很多好處。首先它可以在設備上進行運算,意味著在沒有網路環境的地方也能正常執行。再來就是省去了資料上雲端傳送來回耗時的問題,資料只會再裝置上,因此不會洩漏的問題。
- TFLite:基於 FlatBuffers 對模型進行優化,可以直接部署到 Android、iOS 等終端設備上。
本文中您將學到
- 使用 Python TensorFlow Kears API 訓練一個簡單的迴歸 NN 模型
- 模型的儲存
- 將儲存的模型打包成
.tflite - 將 TFLite 模型放到 Android 手機上
- 使用 Interpreter 測試 TFLite 模型
TensorFlow
TensorFlow 是由 Google 所開源的深度學習套件。它可以被執行在許多種平台上,例如網站或是行動裝置甚至是嵌入式IoT裝置。然而訓練好的 Tensorflow 模型並不能直接部署到這些設備上,必須透過轉換器將模型轉成 tflite。

Keras
很多人都對 TensorFlow 與 Keras 差別摸不著頭緒。簡單來說 Keras 提供一個高階的 API 介面,可以很友善的快速搭建一個 TensorFlow 神經網路。原本這兩個套監視分開獨立維護的,不過在 2019 年 10 月 Google 發布的 TensorFlow 2.0 已經將 Keras 合併到官方的專案當中。這意味著使用 TensorFlow 2.0 以上的版本可以直接夠過 Keras 介面來快速搭建神經網路。
建立資料集
建立一個很簡單乘法器作為我們的迴歸範例。一個輸入對應一個輸出,其輸出為輸入的倍數。舉例來說,輸入 4 其輸出為 8。透過 numpy 快速建立 500 筆資料, X 為輸入特徵,y 為輸出即為輸入的 2 倍數。
import numpy as np


X = np.arange(1, 500, 1)
y = np.arange(2, 1000, 2)
搭建神經網路模型
Keras 有三種模型搭建的方式,詳細內容可以參考這篇文章。在本範例中使用大家最常見的 Sequential 搭建一層神經網路,其中神經元僅有一個,另外沒有設定 activation 預設即為 linear。我們也能夠過 model.summary() 查看模型描述,可以發現模型有兩個權重分別為 w 與 bias。
from tensorflow import keras
from tensorflow.keras import Sequential
from tensorflow.keras.layers import Dense
model = Sequential([Dense(1, input_shape=[1])])
model.compile(optimizer=keras.optimizers.Adam(learning_rate=2), loss=keras.losses.mean_squared_error)
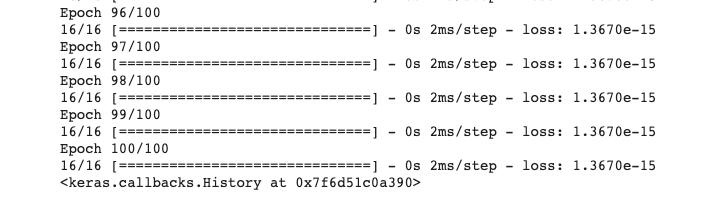
model.fit(X, y, epochs=100)
我們將事先準備好的 500 筆資料全部拿來訓練 100 代可以發現 MSE 逐漸下降。
測試模型
模型訓練完後即可測試一下,隨機輸入一個數值查看預測結果是不是接近輸入的倍數。
model.predict([10])

儲存模型
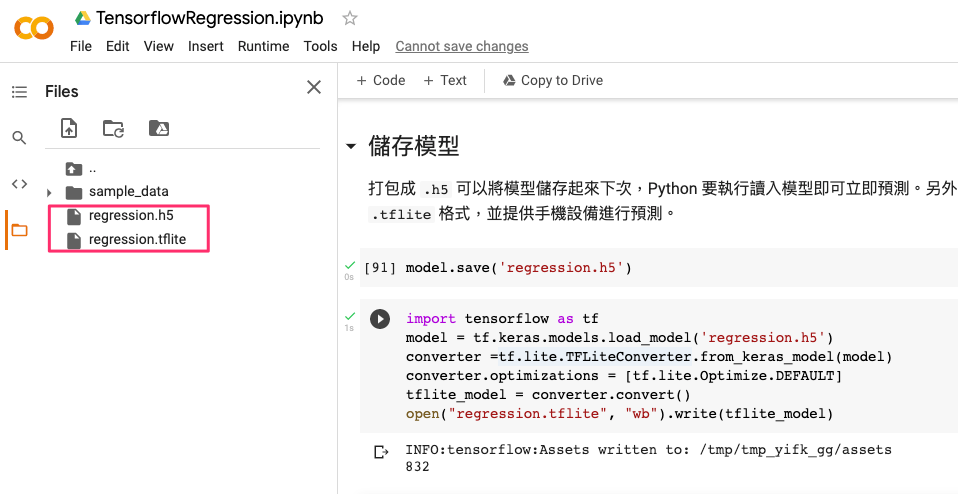
打包成 .h5 可以將模型儲存起來下次,Python 要執行讀入模型即可立即預測。另外透過 TFLiteConverter 可以將 Python 訓練好的模型打包成 .tflite 格式,並提供手機設備進行預測。TensorFlow 提供許多種儲存模型的方法,詳細內容可以參考這篇文章。
model.save('regression.h5')
接著我們想在其他設備執行訓練好的模型必須透過 TFLiteConverter 將模型打包成 .tflite 格式。其中我們設定預設的模型量化模式 tf.lite.Optimize.DEFAULT 來 Quantization 我們的模型。雖然 Quantized 後的模型在預測上可能會降低準確但是在可接受的範圍,其模型大小和執行性能上相對 Float 模型都有非常大的提升。由於在邊緣設備上資源有限,因此需要在模型大小、執行速度與辨識解析度上找到平衡。詳細模型打包方式也能參閱官方文件。
import tensorflow as tf
model = tf.keras.models.load_model('regression.h5')
converter =tf.lite.TFLiteConverter.from_keras_model(model)
converter.optimizations = [tf.lite.Optimize.DEFAULT]
tflite_model = converter.convert()
open("regression.tflite", "wb").write(tflite_model)
TFLite Interpreter
我們上一步已經成功打包並壓縮我們的模型並輸出成 .tflite 檔案。這一隻檔案我們可以直接經由 Python TensorFlow 函式庫所提供的 TFLite Interpreter 直接載入模型並測試。其中預設的 TFlite interpreter 僅使用 CPU 運算。
import tensorflow as tf
import numpy as np

interpreter = tf.lite.Interpreter(model_path='regression.tflite')
interpreter.allocate_tensors()

input_index = interpreter.get_input_details()[0]["index"]
output_index = interpreter.get_output_details()[0]["index"]

input_data = np.array([[100]], dtype=np.float32)
interpreter.set_tensor(input_index, input_data)
interpreter.invoke()

print(interpreter.get_tensor(output_index))
將 TFlite 模型部署到 Android 手機
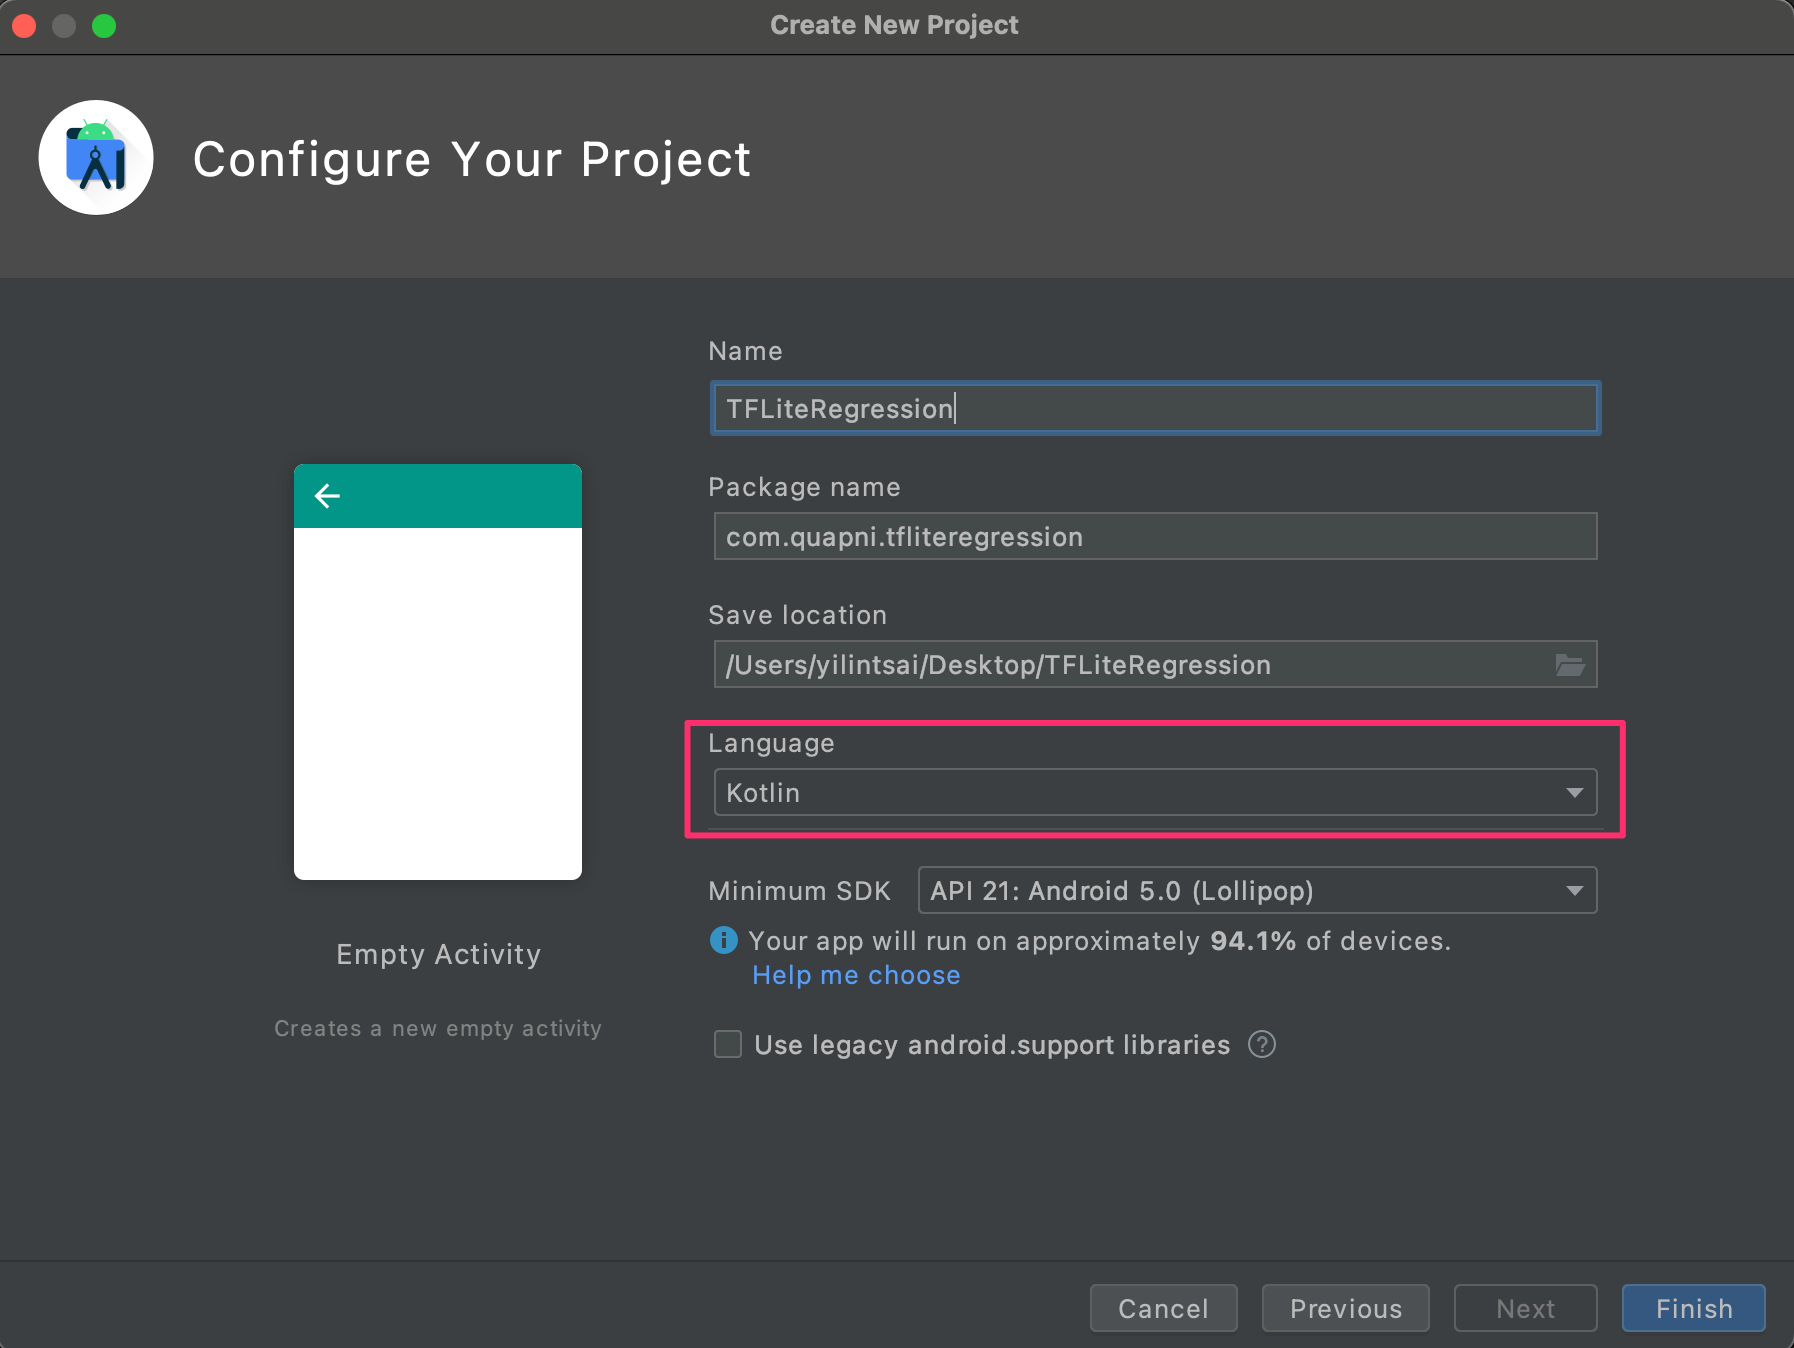
模型一切就緒後緊接著重頭戲就是將模型放到 Android 上讀取並進行預測。首先執行 Android Studio 並開啟一個新專案,其中我們要建立一個 Ktolin 基底的專案。
接著打開 build.gradel(app) 新增 tensorflow-lite 的套件。
implementation "org.tensorflow:tensorflow-lite:+"
另外為了避免簽署生成 apk 期間壓縮我們的模型,我們需要在該檔案內 android{ } 中加入以下描述:
aaptOptions {
        noCompress "tflite"
        noCompress "lite"
    }

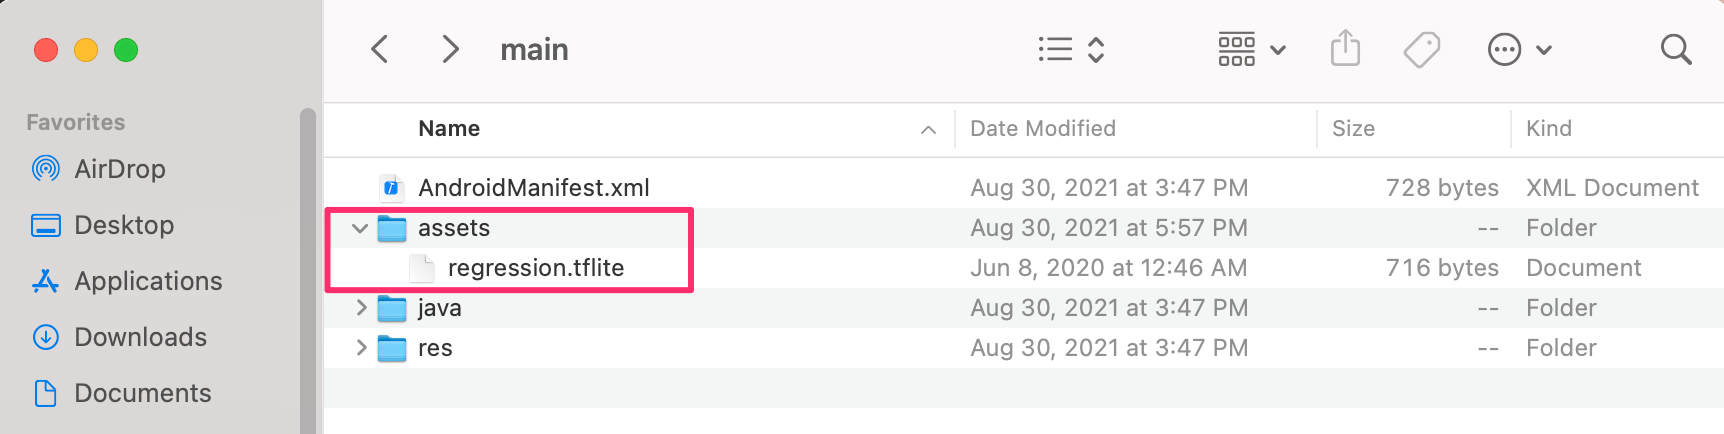
接著建立一個 assets 資料夾放入稍早所轉換好的 .tflite 模型,並將此資料夾放在專案資料夾中 app -> src -> main 的位置。
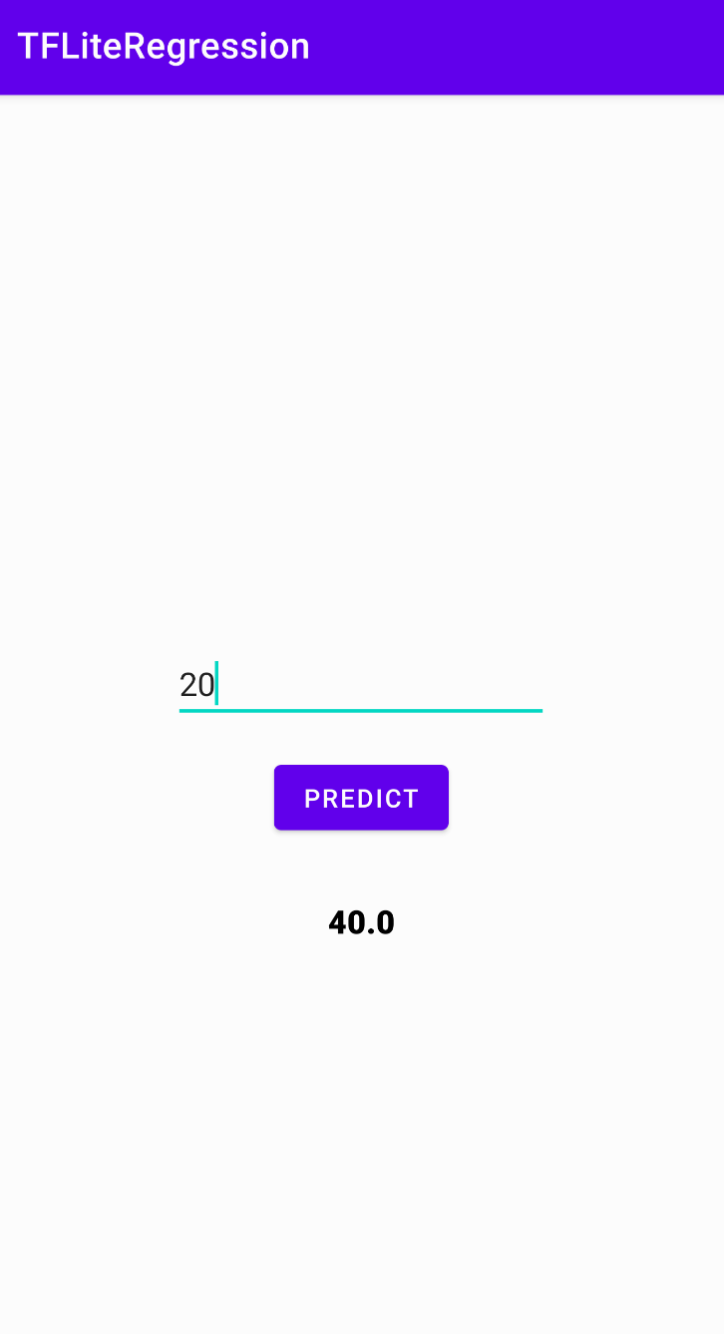
我們先處理 layout 畫面,首先建立一個 EditText 提供使用者輸入數值,並有一個按鈕送(Button)出並觸發模型預測。最後將預測結果顯示在畫面上。
<?xml version="1.0" encoding="utf-8"?>
<androidx.constraintlayout.widget.ConstraintLayout xmlns:android="http://schemas.android.com/apk/res/android"
    xmlns:app="http://schemas.android.com/apk/res-auto"
    xmlns:tools="http://schemas.android.com/tools"
    android:layout_width="match_parent"
    android:layout_height="match_parent"
    tools:context=".MainActivity">

    <EditText
        android:id="@+id/numberField"
        android:layout_width="wrap_content"
        android:layout_height="wrap_content"
        android:ems="10"
        android:inputType="number"
        app:layout_constraintBottom_toTopOf="@+id/guideline"
        app:layout_constraintEnd_toEndOf="parent"
        app:layout_constraintStart_toStartOf="parent" />

    <androidx.constraintlayout.widget.Guideline
        android:id="@+id/guideline"
        android:layout_width="wrap_content"
        android:layout_height="wrap_content"
        android:orientation="horizontal"
        app:layout_constraintGuide_percent="0.5" />

    <Button
        android:id="@+id/btnPredict"
        android:layout_width="wrap_content"
        android:layout_height="wrap_content"
        android:layout_marginTop="16dp"
        android:text="Predict"
        app:layout_constraintEnd_toEndOf="@+id/numberField"
        app:layout_constraintStart_toStartOf="@+id/numberField"
        app:layout_constraintTop_toBottomOf="@+id/numberField" />

    <TextView
        android:id="@+id/txtResult"
        android:layout_width="wrap_content"
        android:layout_height="wrap_content"
        android:layout_marginTop="32dp"
        android:fontFamily="sans-serif-black"
        android:textColor="@android:color/black"
        android:textSize="18sp"
        app:layout_constraintEnd_toEndOf="@+id/btnPredict"
        app:layout_constraintStart_toStartOf="@+id/btnPredict"
        app:layout_constraintTop_toBottomOf="@+id/btnPredict" />
</androidx.constraintlayout.widget.ConstraintLayout>
接著開啟 MainActivity 撰寫主程式,首先建立一個 initInterpreter() 函數載入模型並初始化。其中 options 是對模型的一些資源設定,例如我們設定使用 4 個執行緒。以及設定使用 setUseNNAPI,Android Neural Networks API (NNAPI) 是一個 Android C API,專門為在邊緣設備上針對機器學習運行計算密集型運算而設計。因為我們在這次範例中使用很簡單的網路層架構,如果是影像辨識專案有使用到許多卷積層相關的 API 那麼該模型是可能無法進行 tflite-android 的 NNAPI 加速的。loadModelFile() 函式負責去讀取 regression.tflite 並提供模型初始化。第三個函數是 doInference() 負責接收使用者輸入的數值,並丟入模型預測。我們可以發現 TFLite 一樣是透過 interpreter 進行模型預測,我們需要事先將輸出的變數建立一個空陣列並且使用 FloatArray。
class MainActivity : AppCompatActivity() {

    private lateinit var interpreter: Interpreter
    private val mModelPath = "regression.tflite"

    private lateinit var resultText : TextView
    private lateinit var editText : EditText
    private lateinit var checkButton : Button
    override fun onCreate(savedInstanceState: Bundle?) {
        super.onCreate(savedInstanceState)
        setContentView(R.layout.activity_main)

        resultText = findViewById(R.id.txtResult)
        editText = findViewById(R.id.numberField)
        checkButton = findViewById(R.id.btnPredict)

        checkButton.setOnClickListener {
            var result = doInference(editText.text.toString())
            runOnUiThread {
                resultText.text = result.toString()
            }
        }

        initInterpreter()
    }

    private fun initInterpreter(){
        val options = Interpreter.Options()
        options.setNumThreads(4)
        options.setUseNNAPI(true)
        interpreter = Interpreter(loadModelFile(assets, mModelPath), options)
    }
    private fun doInference(inputString: String): Float {
        val inputVal = FloatArray(1)
        inputVal[0] = inputString.toFloat()
        val output = Array(1) { FloatArray(1) }
        interpreter.run(inputVal, output)
        return output[0][0]
    }

    private fun loadModelFile(assetManager: AssetManager, modelPath: String): MappedByteBuffer {
        val fileDescriptor = assetManager.openFd(modelPath)
        val inputStream = FileInputStream(fileDescriptor.fileDescriptor)
        val fileChannel = inputStream.channel
        val startOffset = fileDescriptor.startOffset
        val declaredLength = fileDescriptor.declaredLength
        return fileChannel.map(FileChannel.MapMode.READ_ONLY, startOffset, declaredLength)
    }
}
就是這麼簡單,上述步驟以完整的部署一個 TensorFlow Regression 模型。雖然近期在官方有提供 TF 2.5 以上使用 TensorFlow Lite Model Maker 可以有更好的部署體驗。不過這還是屬於實驗階段,筆者呈觀望態度。希望之後等穩定發布後再來研究一下,屆時再來寫篇教學文章。
範例程式可以由 GitHub 取得!
Reference
- How to Deploy TensorFlow Regression Model in Android — TF Lite — Part 1
- How to Deploy TensorFlow Regression Model in Android — TF Lite — Part 2
 https://www.youtube.com/channel/UCSNPCGvMYEV-yIXAVt3FA5A